Class Details Page
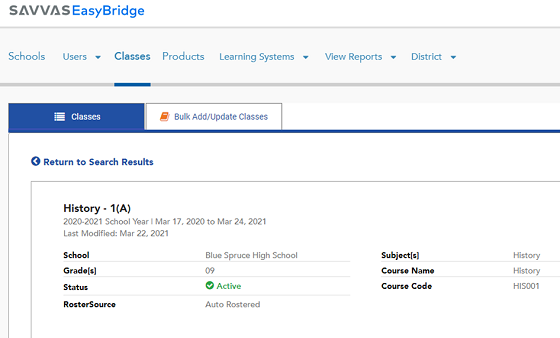
The class details page provides the most up to date information about a specific class that can be used to confirm information or help troubleshoot class issues. To get to the class details page click the name of a class from the Classes page. This takes you to the details page where the following information is displayed for your selected class.
- School
- Grade(s) of the class
- Status - Active, Inactive
- Roster Source
- Subject
- Course Name, Course Code
- Class Type, SIS Source ID
- Date Created
The class details page is also where you can manage the following information, depending on how your district is configured. Expand each topic below to learn more.
Google Matching is enabled by default for EasyBridge Plus districts only. This allows teachers to match existing Realize classes with a Google Classroom class and not create a duplicate class. EasyBridge Auto districts can request that this feature be enabled by contacting Savvas Customer Support. EasyBridge Basic districts are unaffected by this feature when using Google Classroom with Realize. Learn more about Google Classroom Linking.
The products section of the class details page allows you to manage products for the selected class. You can Add Products, Delete Selected Products and navigate to the Product Details page for a specific product.

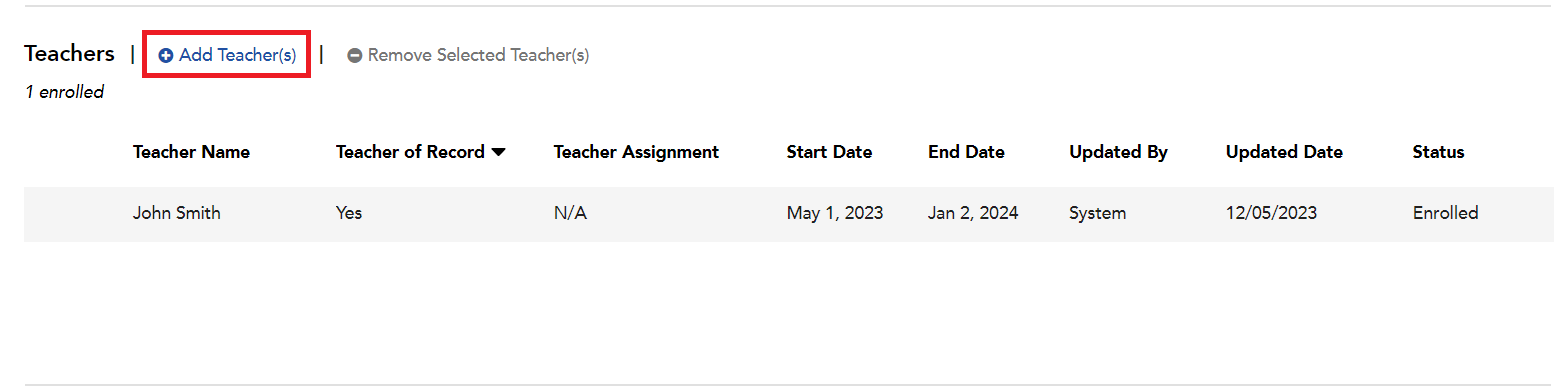
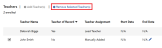
The class details page lists teachers associated with the selected class. You can find the following information about the teachers here:
- Teacher name
- Teacher of record (yes, no)
- Teacher assignment (lead teacher, co-teacher)
- Start date/end date of the class
- Status of the teacher in related to the class - (ie: enrolled)

As an administrator, you can manually add or remove teachers from a class. Follow the steps below to add teachers:
-
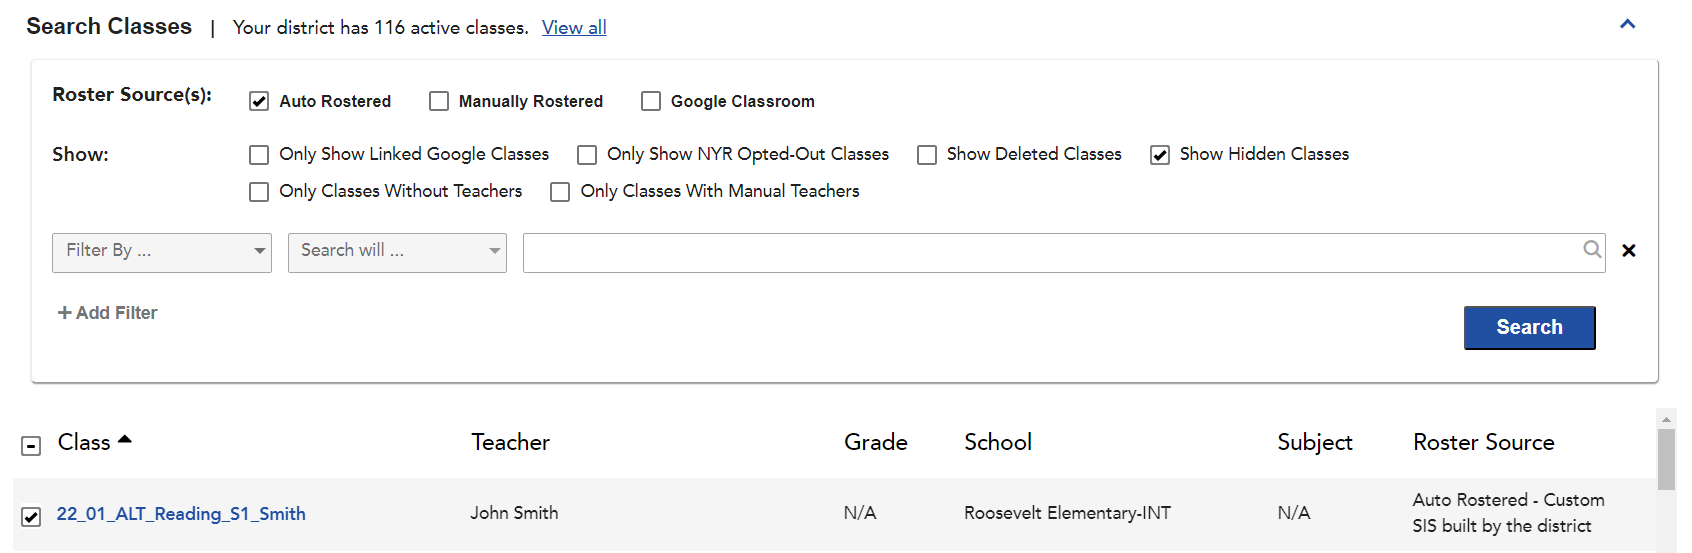
In the Classes tab, select either of the following Roster Source(s): Auto Rostered (for Integrated Classes) or Manually Rostered (for manually created classes by an Admin Import or a teacher created), then press Search.
The manually added Co-Teacher function is not supported for Google Classroom imported classes or LTI-Advantage classes.
You can only manually add teachers to one class at a time.

-
Under Class, select the class you want to add the co-teacher to. You'll be brought to the details page for this class.

-
Scroll down to the Teachers section, and select Add Teacher(s).

-
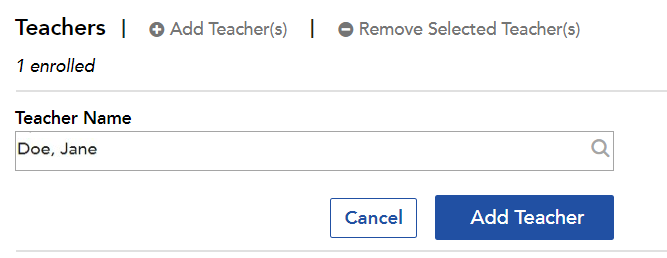
Type in at least two letters to display a list of teachers. The closer you are to the exact spelling of the teacher's name, the more focused the search will be. Once you find the teacher you want, select their name.
-
Select Add Teacher.

-
Once the teacher is added, you can select an end date for the added teacher. If you do not set a teacher's end date, this will default to the end date for the class. If the class does not have an end date, it will default to N/A. The newly added teacher will now see this class when they log in to Realize.

You can also remove manually-added teachers and co-teachers from a class in much the same way that you add a teacher. The process changes when you get to the class details page. Follow these steps to remove manually-added teachers and co-teachers:
-
Once you've found the class you'd like to modify, scroll down to the Teachers section. From here, there are two ways you can remove a teacher: either manually or by setting an end date.
-
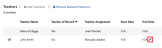
To manually remove a teacher, select the check box next to their name, then press Remove Selected Teacher(s).
-
In the prompt confirming whether you'd like to remove the teacher, click Remove Teacher to remove them, or click Close to leave the window without removing the teacher.
-
To set an end date for the teacher's removal, click the pencil-shaped editing button in the End Date column for that teacher.
-
In the Edit end date window that appears, choose the date that you'd like the teacher removed. Press Save to save the end date; otherwise, press Cancel. The teacher or co-teacher will be removed once the end date arrives.
-
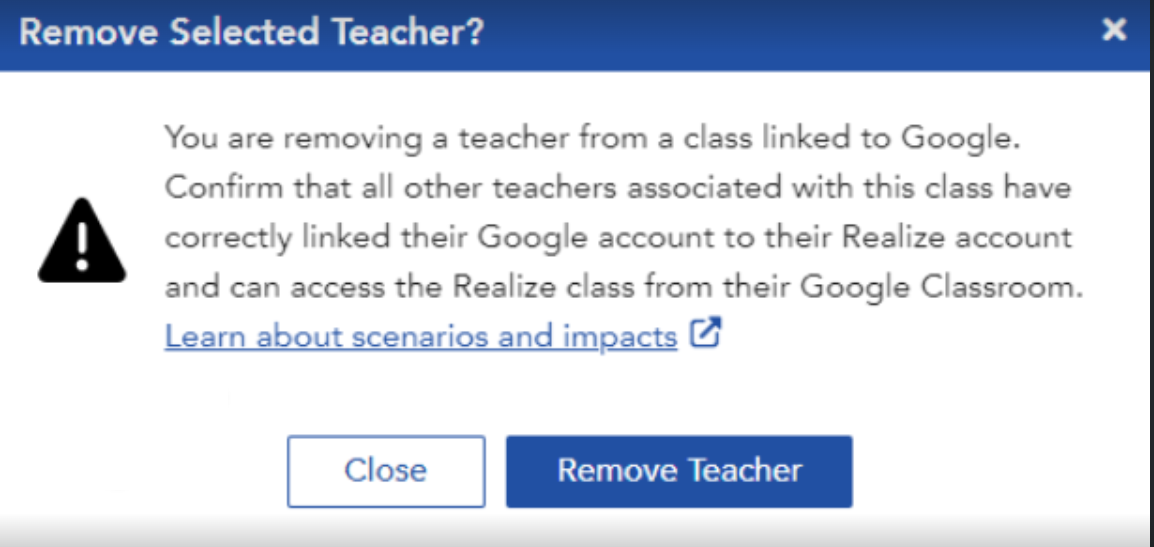
If you're removing a teacher/co-teacher from an auto-rostered class that's linked to Google Classroom, you'll receive a prompt asking you to verify that any other teachers associated with this class have correctly linked their Google accounts to their Realize accounts and can access the Realize class from Google Classroom. Press Remove Teacher to remove the teacher; otherwise, press Close.


A list of students enrolled in the class appears on the class details page below the teacher information. Here you will find the following information:
- Student Name
- Student Username
- Start date of class
- End date of class
- Status of student relative to class (ie: enrolled)
- Account linked (Google Classroom, LTI-A)
- Action to review the mapping if applicable (*)
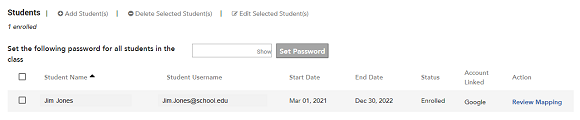
Only manually rostered schools or districts can add and remove students as well as edit student information. Auto rostered districts roster through nightly updates from their Student Information Systems.
Google Classroom mapping is only enabled for EasyBridge Plus districts. To learn more go to Google Classroom Linking.